Friday, June 24, 2011

Donna Salazar SWEET GIRL Card

Hi everyone, Sarah here to share with you a card that I made using the Donna Salazar Antiquities paper line. I really wanted this card to look very girly so I focused on cutting out a lot of the pink florals from the pattern paper, added a yellow cardstock card base, and used a circle punch to punch out some additional frilly patterns. I also cut out a journal card from the Artistic Papers to anchor the sentiment, "Sweet Girl". Then I embellished with a tied bow from red and white baker's twine, drew on my faux stitching, and added my sentiment. I also used the Glue Gloss to add a bit of Fairy Dust Glitter to the small red letters giving them a bit of shimmer.


Have a wonderful day!

Supplies: Donna Salazar Antiquities collection through GCD Studios, Glue Gloss from Clearsnap, Fairy Dust Glitter in Pralines and Cream from Clearsnap, Distrezz-It-All from Zutter

Saturday, June 18, 2011

Best Creations and Helmar Week!!!

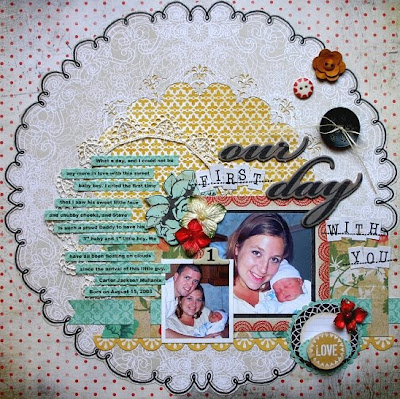
Hi everyone!!! If you hop on over to the Best Creation Blog you will find lots of water themed projects for there Best Creations/Helmar week!! There are guessing games with prizes to be won and many of the designers are having giveaways on their blogs too! Here is my fun water layout that can be seen on the Best Creation Blog and also the Helmar Blog.


Have fun!! LOVES :) -Sarah

Wednesday, June 15, 2011

Clip It Up and BoBunny

Hi everyone!! Today I am really excited to share with you my altered Clip It Up using the Ad Lib collection from BoBunny. I was lucky enough to receive this line from BoBunny through Clip It Up and I just couldn't resist the fun and colorful patterns of this line!! First, I spray painted my Clip It Up Base with a light teal, then really decked it out with pattern paper, stickers, and chipboard from the BoBunny Ad Lib collection. Now this Base holds all of my fabric which means no more digging through bags and piles of fabric trying to see all of my patterns...woohoo


I also had to create a layout with the Ad Lib collection too. My daughter's pics that she snapped of herself walking down the street to the bus stop on her last day of 8th grade were just the perfect match for this line and I'm really liking the way this page turned out.


Hope you have had a blast altering you Clip It Up, and if you still haven't done this then you must give it a try!! Have a wonderful Wednesday!

LOVES :) -Sarah

Tuesday, June 14, 2011

Just Sharing Some Momenta Goodness

Hi everyone, I just wanted to share with you a couple of layouts that I created last week using Momenta very fun Family Outings line. This line is just full of colorful patterns perfect for just about any outdoor themed layout or project.


Head on over to the Momenta Blog to check out what all of the other DT members have been creating, and also check the link at the top right sidebar to see how you can enter to win some yummy Momenta prizes and have fun creating your own custom stickers at the same time....sounds pretty cool, huh?!!

Have a terrific Tuesday!!

LOVES :) -Sarah

Thursday, June 9, 2011

Donna Salazar's Antiquities Collection

Hello everyone, Sarah here today to share with you a layout that I created using the Donna Salazar Antiquities Collection. This line is a lot of fun to work with because of it's versatility! I am a lover of pattern paper, and I often create my own embellishments for layouts from pattern paper. For example, I cut out the paper flowers and leaves on this pattern paper,


spritzed the leaves with the River Mossy Smooch Spritz, inked the edges of each cut out flower with the Cat's Eye Fluid Chalk Queue in Chestnut Roan, crinkled the flowers, and then layered them all together to create these gorgeous 3D flower embellishments on my layout.


I also created a photo frame to use on my layout out of this Donna Salazar Antiquities paper.
In order to create my own photo frame I cut a 5"x7" mat from the pattern paper.
Then I used my trimmer to cut about 1/2" border on the inside of the 5"x7" mat making sure to not cut into the floral print on the paper.
Now I used my craft scissors to cut around the florals by hand.

Here is my frame cut from a 12x12 sheet of paper and a close up of how I used it on my page.


This is my finished layout with both the layered paper flowers and the photo frame. These embellishments are so much fun to make from pieces of pattern paper, and they add such a custom look to all of your projects. I hope you'll give them a try!
My Blog: Welcome To My Neighborhood
Supplies used: DSD Antiquities Collection, River Mossy Smooch Spritz, Cat's Eye Fluid Chalk Queue in Chesnut Roan, Helmar Permanent Adhesive Runner and 450 Quick Dry, EK Success ZigWriter, Martha Stewart Border Punch, Kreaxions Butterfly 4-in-1 Punch, Prima flower and pearl flourish, Basic Grey Pearls, alpha stickers EK Success

Monday, June 6, 2011

MCS June Reveal!!!

Hi everyone!! Happy Monday morning to all of you! My kids still have through Wednesday to have to go to school because of make up days for all of the snow days they missed over the winter and all I know is that I am sooooo ready to have them out of school and home with me!!...not to mention getting to sleep past 6AM!! Anyway, I want to share my layouts that I created using the My Creative Scrapbook Main Kit and Limited Edition Kit.

Main Kit featuring Basic Grey's Sweet Threads Collection:


Limited Edition Kit featuring Crate Paper's Portrait Collection:


Head on over to the MCS Design Team Gallery to see the gorgeous designs from all of the MCS DT!! So much inspiration, you don't want to miss it!!

Have a wonderful Monday!

LOVES :) -Sarah

Friday, June 3, 2011

My Scrapbook Room Video Tour with Clip It Up

Hi everyone!!! Today is my turn, out of the Simply Renee Clip It Up DT members, to share with you my product review for the Clip It Up. I recieved the Clip It Up Base and Upper Tier to use in my scrap space, and I decided to create a video tour so that you can see my entire scrapbook room and how I have put my Clip It Up to good use. As you can see in the video, I have also created a decorative box for the top of my Clip It Up and you can see the tutorial for creating that storage box HERE. Here's the link to my scrapbook room video tour...


All of my manufacturer collections used to take up so many drawers and bins which occupied precious space in my scrapbook room (not to mention how difficult it was to dig through those drawers trying to find the exact items I was looking for), and now it's all hanging right in front of my desk at just an arm lengths away with all of the products in full view!! No more digging through drawers and lost items that never got used because of being burried under stack of products. The products you see hanging on my Clip It Up are from Momenta and you can find them HERE and the blog HERE. I absolutely adore my Clip It Up Base and Upper Tier so thank you for making my life and my creating process easier and more enjoyable!!

Have a fantastic Friday!!

LOVES :) -Sarah

Wednesday, June 1, 2011

MCS June Kits Sneak Peeks!!

Hi everyone!!! I absolutely love the first of the month because that means that I get to share with you my sneaks for the My Creative Scrapbook kits!!! For June, I got to work with the Main Kit and also the Limited Edition Kit....both soooooo incredibly yummy!! Check these out...

Main Kit Sneaks:


Limited Edition Kit Sneaks:


See what I mean, just pure yumminess!!!

Have a wonderful Wednesday and don't forget to come back on the 5th to see the full reveal!

LOVES :) -Sarah